HOW TO BUILD A CAMPER VAN:
L I G H T I N G
In this section we’ll cover :
All aspects of interior and exterior lighting
Switches and fixings
Wiring and installation
Let’s get started.

Contents

Planning

Switches

Interior lighting

Wiring

Exterior lighting

Installation
Many of the products that appear below are either Amazon or eBay affiliate links. We earn a small commission on sales at no extra cost to you.

L I G H T I N G
Planning
In this guide we’ll talk you through all of your camper van lighting options. Whatever your budget and van conversion plan, this guide contains everything you need to know about interior lighting, exterior lighting, light switches, installation and wiring diagrams.
Before deciding what style of lights you want to install in your van there’s a few planning considerations to make based on power consumption, what your van’s layout will be, how you want your van’s aesthetic to look and how you want the mood to feel in your living area. All of these can be decided with a few simple considerations.
In this section we’ll discuss brightness, temperature, styles and how to power your lighting.

Power
Most campervan lighting runs on 12V as it requires minimal energy consumption. LEDs use significantly less power than halogen or fluorescent lighting, meaning they won’t drain your batteries at night. It is possible to install 240V lighting in your van such as the kind you’d find in a house, however it would need to be run through an inverter to convert your leisure batteries’ 12V current into 240V, so this would be significantly less energy efficient.
Most LED lighting consumes just <1amp or 4-10W meaning it could run for days on end on a single battery. Therefore LEDs are usually considered to be the best campervan lighting and all of the products mentioned in this article are LED.
12v lighting is the most popular choice for camper van lighting, but it doesn’t have to look like this!
Brightness
The brightness of lights is measured in Lumens, however the power draw of a light is measured in Watts. The higher the Wattage the higher the Lumens and the brighter your lights will be, which is important to consider as you may want dimmer lighting above your bed area and brighter lighting in your kitchen for example. A dimmer switch can also be installed to easily switch between work mode and relaxing mode.
300 - 500 lumens would be for dimmer areas where you might be relaxing at night
500 - 800+ lumens would be brighter for areas where you are working, cooking etc
Some lights are dimmable for adjustable brightness while some are not; a dimmer switch cannot be fitted to non-dimmable lights.
Temperature
The colour temperature of lights is measured in Kelvin and understanding this can help you to set the mood in your van. Warm lighting can give your space a cozy feel, while cool lighting is helpful for brightening up areas for working in and cooking.
5500 - 7000K = cool white (blue-ish hue)
~ 4000K = neutral white
3500 - 1000K = warm white to amber

Styles
There are three main styles of lighting: ambient, task and accent:
Ambient lighting is the primary light source in a room and provides uniform overall lighting
Task lighting is bright and focused on a specific area to help with activities
Accent lighting can highlight specific features in a room or set a mood
The first two are somewhat essential to van living, but combining all three can create a distinct aesthetic or mood in your van’s living space.

L I G H T I N G
Interior lighting
Let’s now take a look at different options for interior lighting.
There are four main types of interior campervan lighting: spotlights, strip lights, dome lights and reading lights. Fairy lights also get an honourable mention purely for decoration.

Finding the correct lighting for your space is important both functionally but also aesthetically.
Spotlights
Spotlights (also known as recessed lights, downlights or puck lights) are used for ambient, task and accent lighting. They are recessed into a surface and offer bright lighting without a visible light source. They are generally used in the ceiling or under cabinets.
We recommend: These 12V recessed LED ceiling lights from Dream Lighting are a quality option that won’t have you ripping down your ceiling a few months after the build to replace them, unlike cheaper alternatives. They offer warm white lighting that is bright enough when fitted as a set of 4 or 6 to illuminate your van’s living space without being too bright or clinical, consuming just 2W of power per light. They also come with smart matte black or silver bezels and are easily fitted with screws. We have these in both our Bedford and LDV vans.
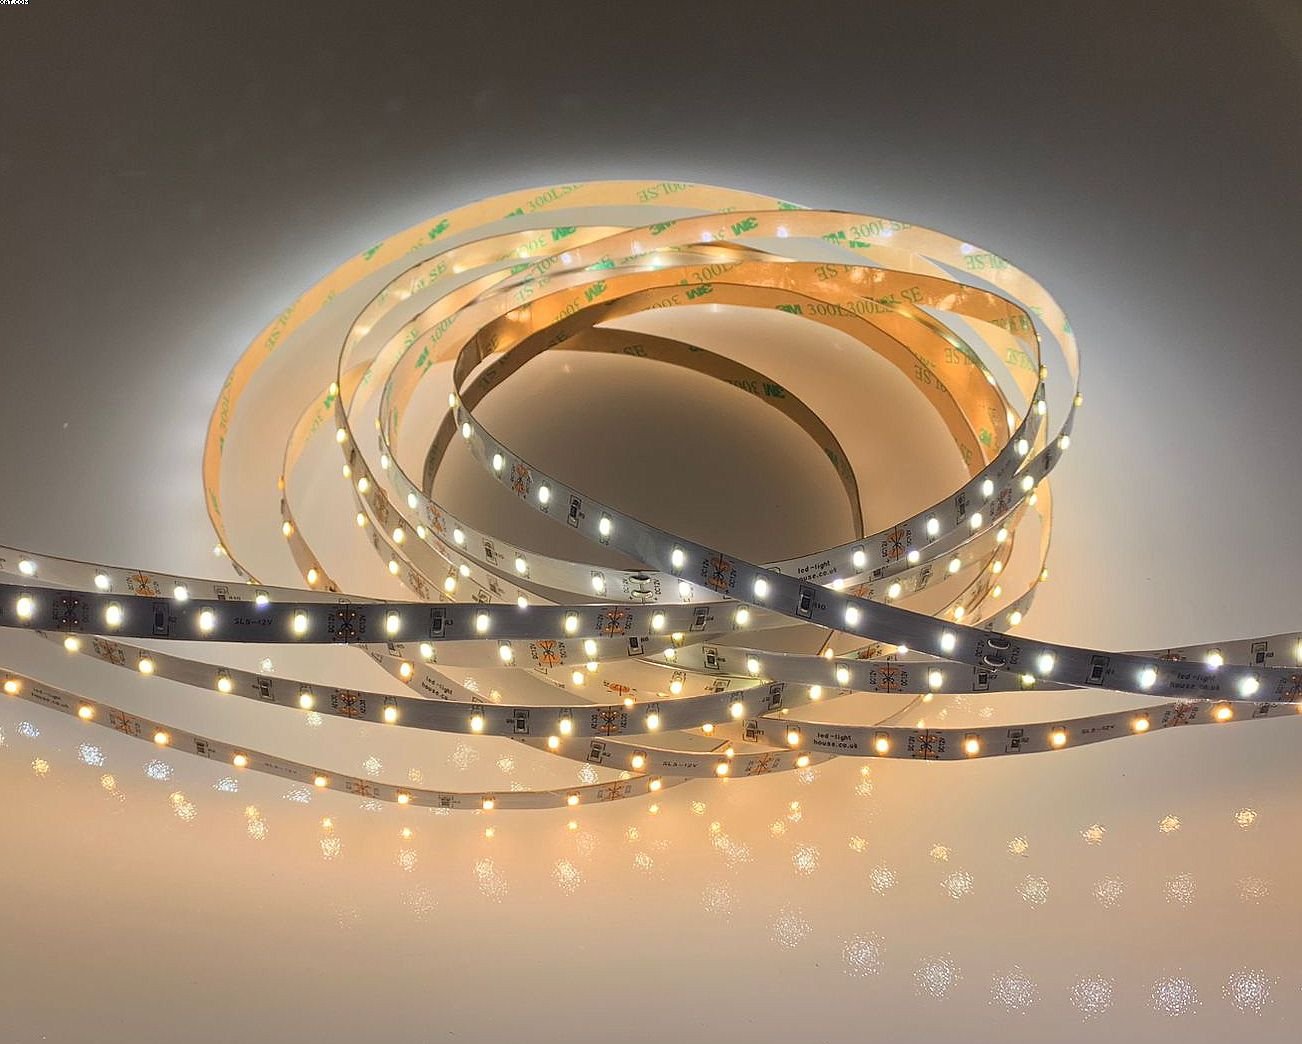
Strip lights
Strip lights can also be used as ambient, task and accent lighting. They offer a lot of flexibility and can be placed anywhere but common areas are around ceiling edges and above and below cabinets. They are attached using an adhesive backing, and can also be cut down to size or joined with connectors to create longer circuits, as well as being remote controlled. The only downside is they’re often prone to snapping and cheap ones fail easily.

We recommend: These LED strip Lights by Lepro come in bright white, warm white or multicoloured and will last significantly longer than cheaper brands without the transformer burning out, the individual LEDs failing or the adhesive backing letting go. They connect directly to your van’s 12V power supply and consume just 3.2W per meter. We have these around our LDV kitchen and they can happily withstand the heat of cooking.
Dome lights
Dome lights offer a diffused uniform light across the whole space from just a single unit. These are usually mounted on the ceiling and are used for ambient and task lighting. They require minimal installation as one to three dome lights is typically enough to light an entire van, however they do protrude more than recessed lights so if standing height is an issue these may not be suitable. They usually come with on/off switches attached which means there’s no need to wire a lightswitch.

This LED dome light by Facon is a low profile dome light that measures 5” across and consumes just 6W of power. Available in cool white or warm white it delivers a bright but diffused 420 Lumens of light.
Reading lights
Reading lights are placed next to the bed; these are used for task and accent lighting. They’re suitably dim for relaxing in the evening and particularly handy for when one person wants to read and the other wants to sleep. Some also have built-in USB charging ports.
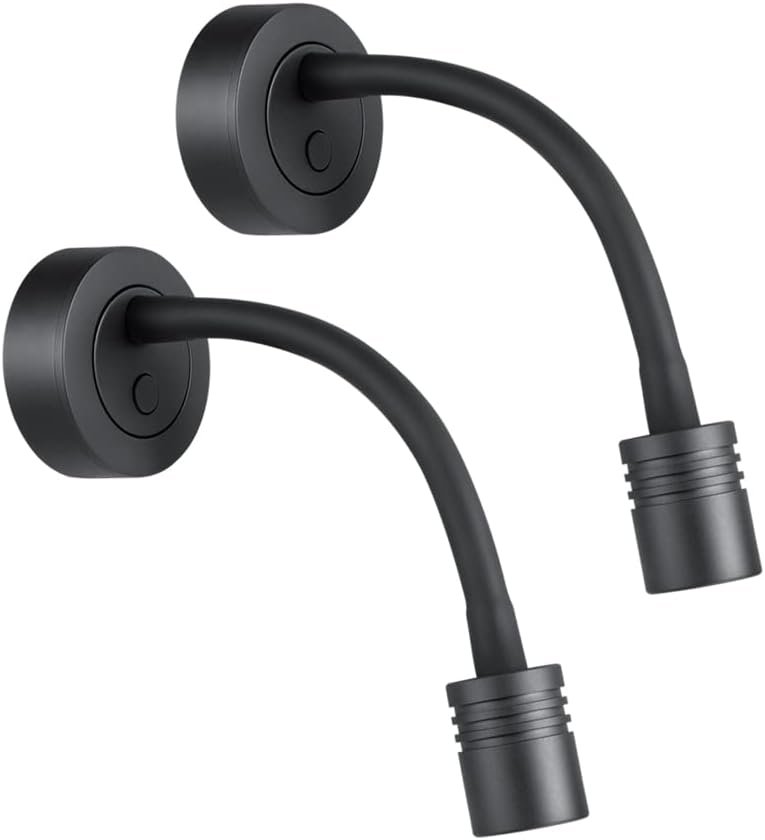
These 12V LED Reading Lights from Dream Lighting come in a range of styles to suit any interior, are easy to install, vibration-proof and draw just 1.9W of power.
Fairy lights
Push lights and fairy lights are low-tech lighting options that run on batteries and can be placed anywhere in a van. Push lights are a cheap option for a budget van conversion that install instantly with adhesive backing strips and run on battery power. They’re not suitable for long-term use though and they’re not very durable. Meanwhile battery-powered fairy lights are always a great addition to a van, will create a cosy evening setting and won’t draw any power from your van’s battery bank.

We recommend the Luminoodle 5ft LED string lights, which is waterproof, USB rechargeable and hangable anywhere with the use of magnets and a strap. Or the traditional copper wire battery power fairy lights work well in most scenarios.

L I G H T I N G
Exterior lighting
Exterior lighting serves a range of purposes for a camper van. Whether you’re looking for camper van awning lights for evenings outside or a light bar to enable you to drive and park up in the dark, having lights on the outside of your van could prove extremely useful.

Awning lights
Awning lights are practically a must-have for camper vans, whether it’s lighting up your evening outdoors or illuminating your nighttime toilet trips they can save the hassle of fumbling around with a torch, and you don’t even need to have an awning to fit one. They come as small LED awning light bars or strip lights, or you could DIY your own with some LED lighting and clear garden hose like we did.

Solar lights
Solar lights are an adaptable lighting source that can be used inside a campervan or outdoors, and running purely off solar energy means they are a great low energy off-grid option. The only downside is longevity, as they will require a full day’s sun to provide enough lighting for an entire evening.

Reversing lights
A couple of LED spotlights can help enormously when parking up in the dark, particularly when wired to your reverse gear, allowing them to come on automatically. We have a set of 18W LED lights attached to our van’s roof at the rear and they have been endlessly useful, but this style of light can also be retrofitted to your van’s bumper to create additional driving lights.

Auxiliary headlights
Although auxiliary headlights do have functions like aiding night driving- in particular off-roading- often they are fitted purely for the aesthetic they add to a vehicle. Either way these are most likely to be added to a 4x4 van conversion than any other type. Hella halogen spotlights are the OGs whereas WOWLED offer a more budget-friendly low energy alternative.

Light bar
Although LED light bars are generally used on 4x4s who says you can’t have a light bar on your campervan too? Whether it’s for long periods of night driving (make sure to turn them off when approaching other vehicles), parking up in the dark or for security, a light bar is not only a useful accessory, let’s be honest- it looks cool too.

Buy on Amazon

L I G H T I N G
Switches
Camper van light switches aren’t just a tool for turning lights on and off; they’re a chance to get creative too! Basic light switches can be fitted into any surround from reclaimed wood to tarnished copper to create a custom look that fits with your van’s theme. The fun thing about building a van is that everything is customisable.

Rocker switch
The most basic and functional light switch is a 12V rocker switch, which come as single units or a switch panel which often incorporate 12V charging and USB ports. They are simple to wire and come in a range of light colours, and can be used for a whole range of applications from living area lighting to exterior lighting controls on the dashboard.

Domestic light switch
A little-known fact is that any domestic light switch can be wired to 12V camper van lighting as long as its rated Amperage does not exceed the consumption of your lights. For example a 240V light switch with a 20A rating will be able to power a set of 12V 0.2A LED lights. This opens up a whole range of possibilities such as black nickel and chrome finishes and even a modern glass touch light switch.

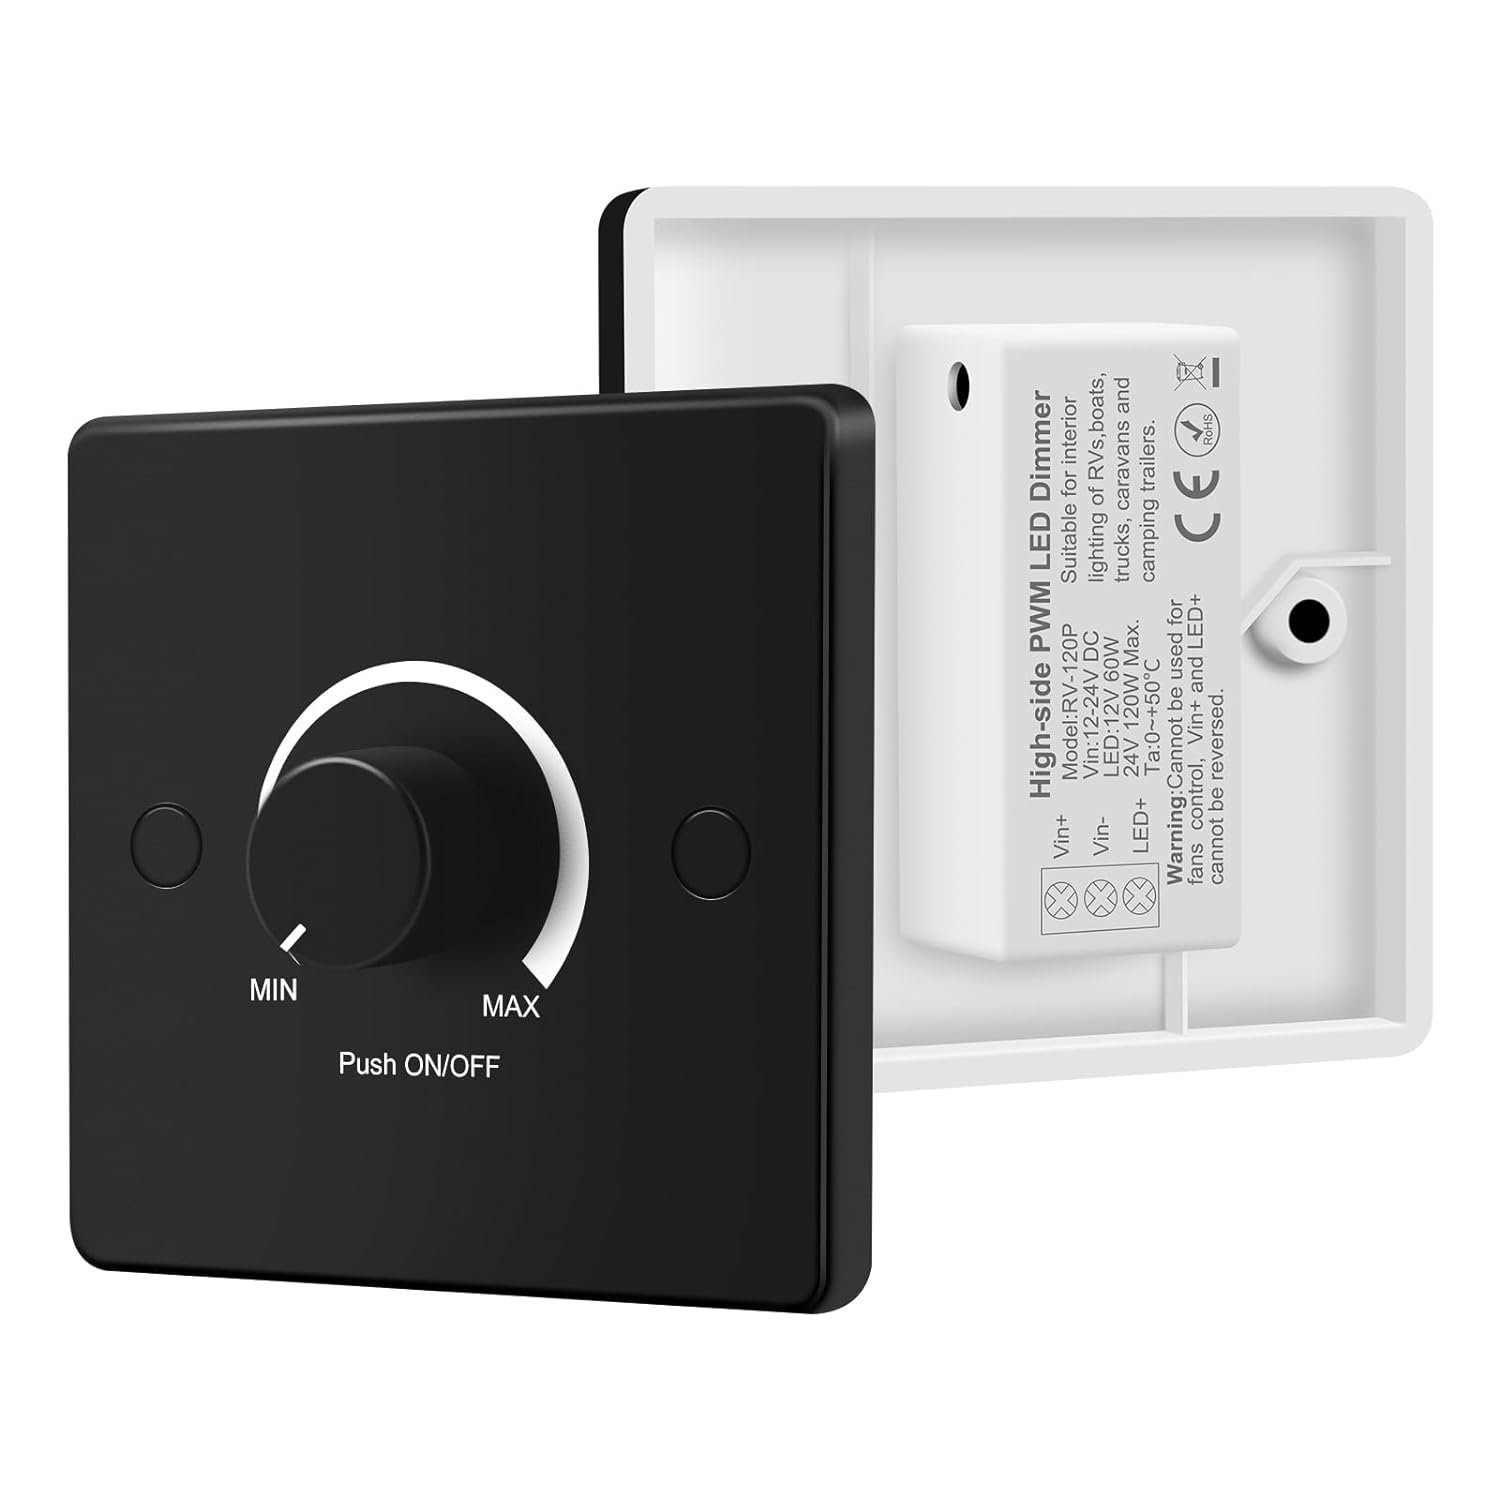
Dimmable light switch
An important thing to note before committing to any light switch purchase is the difference between dimmable switches and non dimmable switches. It’s not as simple as just buying a dimmer switch for your lights; you first have to make sure that your lights are dimmable, otherwise your dimmer switch will only turn them on and off.
12V dimmer switches are available for camper vans; just be sure to check your lights are compatible first.
Rustic / DIY light switch
A rustic or DIY light switch surround is perhaps the most interesting option on this list, favoured by DIY van converters and lovers of all things reclaimed. There are endless ideas out there- reclaimed oak boards (like we used), patina copper, biscuit tins, or even an original vintage light switch like Bakelite that’s been rewired- the options are limitless. For an easier option try a pre-made tarnished copper switch or wood profile surround.


L I G H T I N G
Wiring
If you’re wondering, Do I need experience to build a van? The answer is no!
We knew not the first thing about van building or DIY when we started, but you can pick most skills up from friends, family or if all else fails, YouTube.
Get to know your tools, practice on scraps of wood and metal before you commit to making any irreversible cuts, and always measure twice cut once. But even so, a few wonky lines on a cupboard aren’t the end of the world, and it all adds to the overall charm in the end.
ADD IMAGE OF OUR WONKY LINES
Whatever your timespan is, double it- that goes for budget too. These things always take twice as long as you expect even with the best planning and goodwill. There will always be unexpected hiccups and unforeseeable events so give yourself time, and be kind to yourself if you don’t manage to achieve everything you set out to in a day.
Our LDV conversion took us 10 months in total, in between working full time, partly due to delays caused by the cold, wet winter weather. When we made improvements to our van the second time round it was during the Spring when the weather was considerably better, so the time of year may be an important factor to consider if you can’t find an indoor space to convert your van in.

L I G H T I N G
Installation
When converting a van, weight is a very important consideration, as you don’t want to go over your van’s payload or you will be decreasing its MPG significantly, or even worse you could face penalty fines if stopped by the DVSA.
While it would be a hugely time-consuming effort to tally the weight of every piece of cladding or each of the 3,000 screws you’ve added to your van, you can visit a public weigh bridge before you begin the build to find out your van’s unladen weight, and again once you’ve finished the conversion to find out how much it now weighs (preferably with full water and fuel tanks so you get an accurate picture of your van’s max weight).
Try not to worry too much about weight, unless you’re smothering your van in heavy timber, installing an Aga oven or planning on housing a family of 10 you’ll probably come within your van’s max payload. Try to prioritise light materials over heavy ones such as solid wood, and pay more attention to weight distribution. Remember also, you will need to evenly balance the heaviest items in your van (oven, water tanks, batteries, gas bottles etc) across both sides so your van does not lean to one side when driving.