HOW TO BUILD A CAMPER VAN:
E L E C T R I C A L
In this guide we’ll cover:
The basics of camper van electrics
Energy consumption
Camper van electrical equipment
12/240v systems
Solar panel guide
Battery guide
Inverter guide
Split charge relay system
Wiring guide and diagrams
Let’s get started.

Contents

The basics

Battery guide

12V vs 240V

Inverter guide

Wiring guide and diagrams

Solar panel guide

Split charge relay guide
Many of the products that appear below are either Amazon or eBay affiliate links. We earn a small commission on sales at no extra cost to you.

E L E C T R I C A L
The basics
Whether you’re looking for a simple camper van electrical system or a full off-grid set up, this guide will talk you through the basics of camper van electrics, how to work out your consumption and all the equipment you’ll need to create the perfect van conversion electrical system.

If you’re scratching your head wondering What size solar panel do I need? What’s the difference between Watts, Amps and Volts? then this guide will give you all the knowledge you need to successfully power your camper van, as well as a simple guide to working out camper van electrics.
When planning your camper van electrical system you’ll need to ask yourself some questions:
What appliances will you be running / devices you’ll be charging?
What is the power consumption of these appliances?
Will you be living off grid, and if so how long for at a time?
Will you have access to EHUs (Electrical Hook Ups) at campsites?
Do you plan to do a lot of driving, or live in your van mostly stationary?
What climates will you be travelling in- will you need heating, or air con?
What will you be using your van for- full time, part time or weekends?
Will you be using your van as an office?
Will you need a fridge that’s running full time?
Knowing the answers to these questions will determine what kind of electrical system you need in your van, how many batteries, what size solar panel, whether you’ll need an inverter or a split charge relay. And if some of these terms seem confusing to you, don’t worry; we’ll be talking through each of these sections in detail later on.
When doing your research, you’ll likely come across a lot of technical jargon that can be tricky to understand. We’ve put together an explanation of common electrical terms and what they mean for you and your van conversion.

Electrical terms
A = Amps: The intensity of a current passing through a wire (usually used to rate fuses or USB chargers).
Ah = Amp-hour: Used to measure the amount of time in hours a battery can operate before it is exhausted. 1Ah = 1 hour of running at 1 amp. 100Ah = 100 hours of running at 1 amp, or 1 hour of running at 100 amps.
W = Watts: The amount of power being consumed, used to measure how much power your appliances use (i.e. the higher the Wattage, the quicker it will drain your batteries).
Wh = Watt hours: The amount of energy a device uses within a certain timeframe. One Watt hour is equal to one Watt of power used over an hour.
V = Volts: The voltage of a battery, measuring the potential energy between two points. Volts can be used as the closest measure of a battery’s current capacity. Most batteries operate at 12V.
You can work out any of the above by using the formulas below:
W x h = Wh
A x h = Ah
W ÷ A = V
A x V = W
W ÷ V = A
Continuous power (RMS): The amount of power an inverter can support over a long period of time.
Peak power: The amount of power an inverter can support for a brief period of time (i.e. most devices will create a short power surge when plugged in before returning to their normal running power).
If this seems confusing, think of this analogy instead. Volts are a river; the faster the river the higher the voltage. Amps are the amount of power that a person paddling in a canoe would need to put into their paddles to gain speed down the river. Watts are the amount of sweat produced as a by-product from all their paddling. If the river is fast then the canoeist won’t need to work their paddles as hard and so they won’t sweat as much. So if a system runs at a higher voltage then the amps and watts will be lower.
Calculating your power consumption
In order to choose an ample-sized solar panel, batteries or inverter, you’ll need to work out your power consumption. This isn’t something we usually pay attention to in a house, but it can mean the difference between a comfortable evening or a night in the dark in a van.
The easiest way to start is by gathering your appliances, devices and chargers and checking their Wattage; this is usually written on the plug or inverter. What you’ll be looking for is the appliance with the highest Wattage, or the combined Wattage of any appliances you’ll be running at the same time. This number +20% will determine roughly what size inverter you will need. We cover this in more detail in the Inverter guide below.

Next you’ll need to work out what capacity of battery power you’ll need. This will be determined by how many hours you’ll be using your appliances for, and how long you plan to use them for in between charges. It’s vital to remember that different battery types have a maximum amount they can be discharged before it will cause damage to the battery. You’ll also need to decide what type of battery you want to install; we cover the different types of leisure battery and their pros and cons in the Battery guide below.
To recharge your leisure batteries, you have several options: Electric Hook Ups at campsites, a split charge relay, solar panels or a combination of the three. To work out the size of solar panel you’ll need, you’ll need to know the capacity of the batteries you’re installing.
For advice on installing a split charge relay or EHU head to the guides below.
To work out what size solar panel(s) you’ll need, simply multiple your consumption in Watts by the number of hours you intend to use your device(s) every day.

It’s also helpful to know how many hours of direct sunlight you’ll be receiving per day; in the UK and Europe this averages at 4 in the summer and 3 in the winter, but of course this depends entirely on the weather, and you could find yourself with as low as 1 or as high as 6 hours of good sunlight a day. Therefore we recommend having a back up power source, such as a split charge relay or generator, if you’re likely to need a continuous source of power.
A 100W solar panel receiving 4 hours of sunlight a day will generate on average 400W of power to put into the batteries, and this is where having a good solar charge controller can really maximise the amount of solar power you gain.
The more solar panels you have the longer you can live off-grid, but in our experience there’s no need to go overboard with them, and you only need install as many solar panels as will fit on your van roof. One 200W solar panel is enough to keep a 200Ah leisure battery topped up during the day, and there’s no need to install enough solar panels to run all of your devices off 24/7 providing you have an alternate power source.
For more information check out the solar panel guide below.
Takeaway:
Watts x hours = Watt Hours (daily power consumption)
Solar panel wattage x hours of daylight = power generated and fed into battery
There’s a few helpful calculators online if you want to get more technical, but in our eyes a camper van electrical system needn’t be over-complicated.

E L E C T R I C A L
12V vs 240V
If you’re new to camper van electrics then the difference between 12V and 240V electrics may seem confusing, but it’s easy to get your head around.

Many appliances in vans can run off a 12v DC current.
Electricity runs on either an AC or a DC current. In general, lower voltages will run on DC and higher voltages run on AC, although this isn’t always the case.
12V DC is the most commonly used electrical system in vehicles; everything from your car battery to your camper van fridge will run on 12V DC.
240V AC is the power supply current of mains electrics in the UK. Most domestic appliances run on this voltage and so in order to use them in a camper van you will need to convert this voltage using an inverter.
Devices which run on 12V include phone chargers, batteries, water pumps, cool boxes, fans and lighting.
Appliances which run on 240V include coffee makers, hairdryers, microwaves, mini ovens and blenders.
As leisure batteries operate on a 12V current it’s more efficient to run as many devices directly on a 12V current as possible, instead of converting the voltage from 240V down to 12V.
Fortunately you can get a whole range of appliances which have been designed specifically to run on 12V. These include things like microwaves, TVs, laptop chargers, hairdryers and electric blankets.
12V wiring is also significantly lighter and thinner than 240V wiring, and each should be used for their respective applications only- never overload your wiring or you could risk it catching fire. To ensure this does not happen, make sure you choose wiring with a suitable amperage rating.
We always recommend using Durite wire as it’s robust and less likely to experience wear or faults over time.

If you want to take the headache out of choosing wiring, you can even buy a complete camper van electrical system kit online.

E L E C T R I C A L
Solar panel guide
If you’re wondering, What size solar panel do I need for my camper van? then don’t worry- there’s a simple way to work it out. Primarily, your decision will be affected by the amount of roof space you have on your van; an average van probably only has room for one fixed solar panel, whereas a bus could accommodate up to four.
There’s a formula for working out exactly what size solar panel you need, or you can skip to the end of this section for a simplified method.

Once you have your Watt Hour number from the power consumption section above, divide this number by the hours of direct sunlight your solar panel will receive on average each day.
This varies by geographical region and time of year, but in the UK and Northern Europe you can expect to receive around 1 hour in the winter and 4 in the summer.

Using the example above, with a 600Wh daily power consumption, divided by 4 hours of sunlight per day, that would give a rating of 150W. This would be a minimum rating, so you could certainly go higher.
The simple method:
In our opinion you don’t need a solar panel big enough to run your appliances on, just to keep your batteries topped up on a sunny day, with a split charge relay or generator as a back up in the winter.
A 100W solar panel is enough to keep two 110Ah batteries fully topped up in direct sunlight, so a 200W panel would be plenty to keep your batteries topped up on even a cloudy day. Any more than this, unless you have roof space and plan to live off grid for several weeks or months at a time, is just overkill.
Rigid vs flexible
Between the two types of solar panel, rigid and flexible, there are few differences in performance, however there are big differences in ease of installation and price. While rigid solar panels are constructed of aluminium and tempered glass, flexible solar panels are simply solar cells with a protective plastic layer on top.
Here are the pros and cons of each:

PROS:
+ Sturdy build
+ Cheap
+ Efficient
+ Permanently angled toward the sun
CONS:
- Heavy
- Requires sturdy mounting
- Less aerodynamic
PROS:
+ Lightweight
+ Flexible
+ Easy to mount
+ Can be angled for optimum sunlight
CONS:
- Susceptible to scratches
- Less durable
- More expensive
Flexible solar panels are great for angled or curved roofs, while rigid solar panels will fit nicely on flat or ribbed roofs. You also have the option of a removable solar panel, which you can prop up against your van and angle towards the sunlight for maximum charging efficiency.
Polycrystalline vs monocrystalline
Two terms you may have come across when searching for camper van solar panels are polycrystalline and monocrystalline.
But what do these really mean?
Monocrystalline solar panels are generally more efficient, however this comes at an added price.
Polycrystalline solar panels are generally lower in efficiency, but cheaper to buy.
You can generally tell the difference, if not advertised, as poly panels tend to have a blue hue as opposed to mono panels with a black hue.

The choice between the two will largely depend on your personal preference and your budget.
If you want to take the hassle out of shopping around, you can actually buy a leisure battery and solar panel kit on eBay.


Solar charge controllers

A good solar charge controller will help you get the most efficient charge from your solar panel into your batteries. Purchasing a good quality solar charge controller is more important than purchasing an expensive solar panel.
There are two main types of solar charge controller: PWM and MPPT.
PWM stands for Pulse Width Modulation, and is the most basic type of solar charge controller as it simply turns on when the sun shines, and off when it doesn’t. They’re cheap to buy, but up to 40% less efficient than an MPPT controller.
MPPT stands for Maximum Power Point Tracking, and is the more advanced type of controller. It tracks your batteries and solar panel input and works to deliver an optimum charge to them based on the amount of sunlight available, switching between trickle and full charge. These are significantly more efficient, up to 95%, but that is reflected in the price.
Having a properly sized solar charge controller is important to reduce the potential of damage to it from overloading. To work out what size solar charge controller you will need to do the following calculation:

Take the Wattage from your solar panel and divide it by the voltage of your battery i.e. 100 ÷ 12 = 8.3. Now add on a safe margin of 25%, which would equal 10.3. As solar charge controllers are rated in multiples of 10, a 10amp solar charge controller would be ever so slightly undersized, so we’d be looking at the next rank up, a 20 amp.
We recommend the EPEver MPPT solar charge controller for its efficiency and reliability, and it has done wonders since upgrading from a basic £10 PWM controller in our van. Wiring in a remote meter is also a simple way of monitoring your solar charge and battery levels from your van’s living area and in our opinion is definitely worth the small extra cost.
To see an example camper van electrical system head to the section below to check out everything we have in our LDV.


E L E C T R I C A L
Battery guide
Installing an auxiliary battery system in your camper van is crucial to spending any amount of time living off grid; imagine living in your home with no power to charge your devices or run appliances. What type of battery you choose and its capacity are entirely up to you.

Choosing the right batteries for your set up is an important factor in any van conversion.
Types of leisure battery
There are four main types of leisure battery, each with their pros and cons. They are:
Gel
Lithium
Lead acid (FLA)
Absorbed Glass Mat (AGM)
Gel batteries

Gel batteries are similar to AGMs, except they contain silica to turn the acid inside the battery into a thick liquid. The problem with gel batteries is that they are quite delicate, and the gel inside is susceptible to burning in high amperage situations, making them ill-equipped for quick charging or high discharge.
Gel batteries have a maximum discharge depth of 75% before sustaining damage.
Lithium batteries

Lithium leisure batteries are a relatively new concept that is taking the camper van world by storm. They have many advantages over lead acid batteries, such as the ability to charge them quicker, and they are more efficient too, running at a higher amperage. They are also lighter and are able to withstand up to an 80% discharge, compared to lead acid which can only be discharged up to 50% before sustaining damage. The downsides? The cost, primarily, as lithium batteries are significantly more expensive than lead acid, and additionally charging them in sub-zero temperatures can lead to internal damage.
Lead acid (FLA)

Lead acid batteries are the most common type, found in everything from vehicle engines to submarines. They’re cheap to buy and replace, hold a charge over long periods of inactivity and can tolerate a continuous trickle charge.
Lead acid batteries have a maximum discharge depth of 50% before sustaining damage.
Absorbed Glass Mat (AGM)

AGM batteries are similar to lead acid batteries with the exception that the acid within them is sealed between fibreglass mesh plates which, unlike traditional lead acid batteries, makes them spill-proof. They have enhanced reliability, a slow self-discharge rate and good performance at a range of hot and cold temperatures, but this comes at a higher cost.
AGM batteries have a maximum discharge depth of 80% before sustaining damage.
Battery capacity
TL;DR for normal power usage we’d recommend a couple of 110Ah leisure batteries as a good base to start, a split charge relay and solar panels to keep them topped up, and a remote meter for keeping an eye on your levels. That’s all you really need, and van build electrics needn’t be overcomplicated.
No doubt at this point you’ll be asking yourself, What size battery do I need for my van? Fortunately there’s an easy way to work that out, to save yourself the guess work.
Remember when we calculated the Watt hours of our appliances?
Once you have that number by multiplying the wattage of your devices by the number of hours you’ll likely be using them each day, you’ll just need to use the following formula to work out your battery capacity:

Say you have a 100W laptop charger you plan to use for 6 hours a day, that would give you a 600Wh by multiplying 100W x 6 hrs. Most batteries run at 12V, so if you divide 600Wh by 12V you’re left with 50Ah. Amp Hours (Ah) are the measurement of how much amperage a battery can provide for one hour.
Now you need to work out what type of battery you will be installing and take into account its maximum discharge rate.
Say we have a 100Ah lead acid battery which can safely be discharged up to 50%. By using 50Ah of this battery’s capacity charging that laptop for 6 hours a day, we will have reached the battery’s maximum discharge rate, so a 100Ah battery would be the minimum this system would require. Ideally you should multiply this number by 2 to give an optimum battery size.
This calculation is really just a benchmark, as there are many factors to consider such as the amount recharged by the van’s solar panels, or the fact that its owner may run the engine with a split charge relay in between those 6 hours of battery use, so really what we’re looking at is a minimum battery capacity plus some extra to be on the safe side.
You really want to keep an eye on your battery’s level with a meter, and try to keep it above 12V at all times to preserve its lifespan.
To see an example camper van electrical system head to the section below to check out everything we have in our LDV.
Wiring in series vs in parallel
When installing your leisure batteries you have two options: wiring in series, or wiring in parallel.
While wiring in series will combine the voltage of the two batteries while retaining the same Amp Hours, wiring in parallel will keep the same voltage but increase the Amp Hours (overall capacity).
As an example, let’s say we’re wiring together two 100Ah 12V batteries:
Wiring the two batteries in series will give us a 24V output, but a 100Ah capacity.
Wiring the two batteries in parallel will give us a 12V output, but a 200Ah capacity.
Wiring leisure batteries in parallel is the most common method used in van conversions, and wiring in series is usually reserved for high powered truck engines.
Extra considerations
Cold weather will negatively affect your leisure batteries; if you plan to travel to colder climates then you may want to consider building an insulated box to house them.
Installing a remote meter is a simple way to keep an eye on your battery’s level to ensure it doesn’t drop below 12V, which can cause damage and reduced performance over time.
Batteries are something that are worth splurging on when building your van; good quality batteries can outlive cheap ones threefold.
Installing a battery isolator switch is an easy way to recharge your starter or leisure batteries, and gives you a backup power source for starting your van should your starter battery run flat.
The holy grail
We mentioned at the start of this guide that there is no way to find out your battery’s capacity other than measuring its voltage. Well, we lied…
We were recently shown this incredibly handy tool and we don’t know why everyone doesn’t have one of these in their van- I know we’ll be carrying one on all future trips.

A battery tester like this can be extremely helpful and gives peace of mind when living off-grid.
This battery tester device can instantly tell you how charged any battery is and whether said battery is in good health or needs to be replaced. It can also tell you things like how well the battery is charging, or how the vehicle’s engine is cranking, but we’d recommend keeping one of these pocket-sized tools in your glove box along with other essentials like an OBD reader at all times. It takes the guesswork out of wondering whether you’re dealing with a dead battery or a dodgy alternator, and can help keep your leisure batteries alive for much longer.
Check out our guide on van travel and conversion essentials here.


E L E C T R I C A L
Inverter guide
An inverter is an essential piece of equipment if you want to use household appliances in your van; read on to find out how inverters work and what size inverter you'll need for your van conversion.

How inverters work
So the first question you’re probably asking is: do I need an inverter at all? This depends on what appliances you plan to run in your van and what you plan to run them on.
If you’ll only be charging your phone and maybe running a cool box then this can all be done using the 12V cigarette lighter in your van and you may not need an auxiliary system at all. However if you plan to charge your laptop, run a microwave, charge your power tools or run just about any household appliance then you’re probably going to need an inverter.
So how exactly does an inverter work?
Most batteries and portable electronic devices run on 12V DC, whereas most domestic appliances such as dishwashers and microwaves run on 230V AC. If you wish to use a household appliance in a van therefore you will need to convert your leisure batteries’ 12V current into a 230V current. This is where an inverter comes in.
Say you want to use your coffee maker in your van, the inverter will convert your leisure battery’s 12V current into a 230V current that will deliver the correct voltage to allow you to make coffee. However say you want to charge your laptop; the inverter will convert your battery’s 12V current into a 230V current which your laptop’s transformer will then convert back into a 12V current. This of course is an inefficient way to charge your laptop, so wherever possible it is best to run your appliances directly on 12V in your van. Many appliances can be run on 12V including fridges, laptop chargers, hairdryers, electric blankets and fans, so always look into these more power-economical options first.

There’s a whole range of 12v laptop chargers available online with universal fittings, and even 12V MacBook chargers too.
Pure Sine Wave vs Modified Sine Wave Inverters
When shopping for a camper van inverter you will most likely have come across the terms “Pure Sine Wave” and “Modified Sine Wave”, but what do these mean?
Simply put, both types of inverter convert a 12V DC current into a 230V AC current; the difference is how they do it. Pure sine wave inverters closely mimic an actual sine wave in the form of a smooth alternating wave which switches polarity each time it reaches zero volts, whereas modified sine wave inverters create a square wave where the polarity is flipped abruptly between negative and positive. This is best visualised in the form of a graph:
While a modified sine wave inverter will be fine to operate or charge most appliances, a pure sine wave inverter should be used for sensitive electronics or anything with an AC motor such as laptops, refrigerators and microwaves. Although pure sine wave inverters are more expensive than modified ones, the extra cost can be worth it to protect your electronics.
Peak vs continuous power
A term you will frequently come across when shopping for inverters is Peak power vs Continuous. So what do these mean?
Peak power is the amount of Watts an inverter can support for a short amount of time, like a brief power spike when plugging an appliance in. It cannot sustain this amount of power for any length of time, and any surge in power over this Peak rating will cause your inverter to cut out as a precautionary measure.
Continuous power is the amount of Watts an inverter can support indefinitely, i.e. while your appliance is running. You should choose an inverter based on the Continuous power for the devices you intend to use.
How to figure out what size inverter you need
There is a simple formula to figure out what capacity inverter you will need to run the electronics in your van. First, find all of the devices you plan to use in your van and make a note of their different Wattages; these can normally be found underneath or on the side of your device, and on the transformer of your laptop charger.
Next, decide which of these devices are the most powerful and which you will be running at the same time as each other i.e. you might need to charge two laptops, one 110W and one at 90W, so this would make 200W in total. Now add 20% to this number to give yourself a safe margin; you don’t want to be maxing out your inverter with all of these devices plugged in. That would give us a power rating of 240W, so we’d be looking at buying an inverter that’s around 250W-300W RMS.
Choosing the correct size inverter is important for several reasons; if the power rating is too low you risk the inverter cutting out, getting damaged or even breaking altogether. Too high and you’ll be consuming excess power and draining your battery much faster than necessary. Imagine trying to hammer in a nail with a sledgehammer; this is effectively what you’re doing if you try to use a 3000W inverter to power a 90W charger. It’ll do the job, but frankly it’s just overkill.
Extra considerations
Turn your inverter off when it’s not in use as it can still draw power and drain your batteries in the background.
Ensure all electrical components are properly earthed to the metal of your van; improper grounding can cause issues like power surges or non-functioning.
Your inverter should be wired close to the batteries to minimise the amount of DC wiring you use. This is because AC wiring is far more efficient than DC wiring, and DC wiring should never be used to run anything more than 100A; for this you would need heavy duty wiring.
Your battery will only ever operate at 90% capacity, so take this into account.
Make sure you have enough battery capacity to power your inverter. The formula for working this out is as follows:
1.5W for every Ah of an FLA battery
3W for every Ah of an AGM battery
6W for every Ah of a Lithium battery
So to power a 300W inverter from an AGM battery, you should have at least 100Ah of battery capacity.
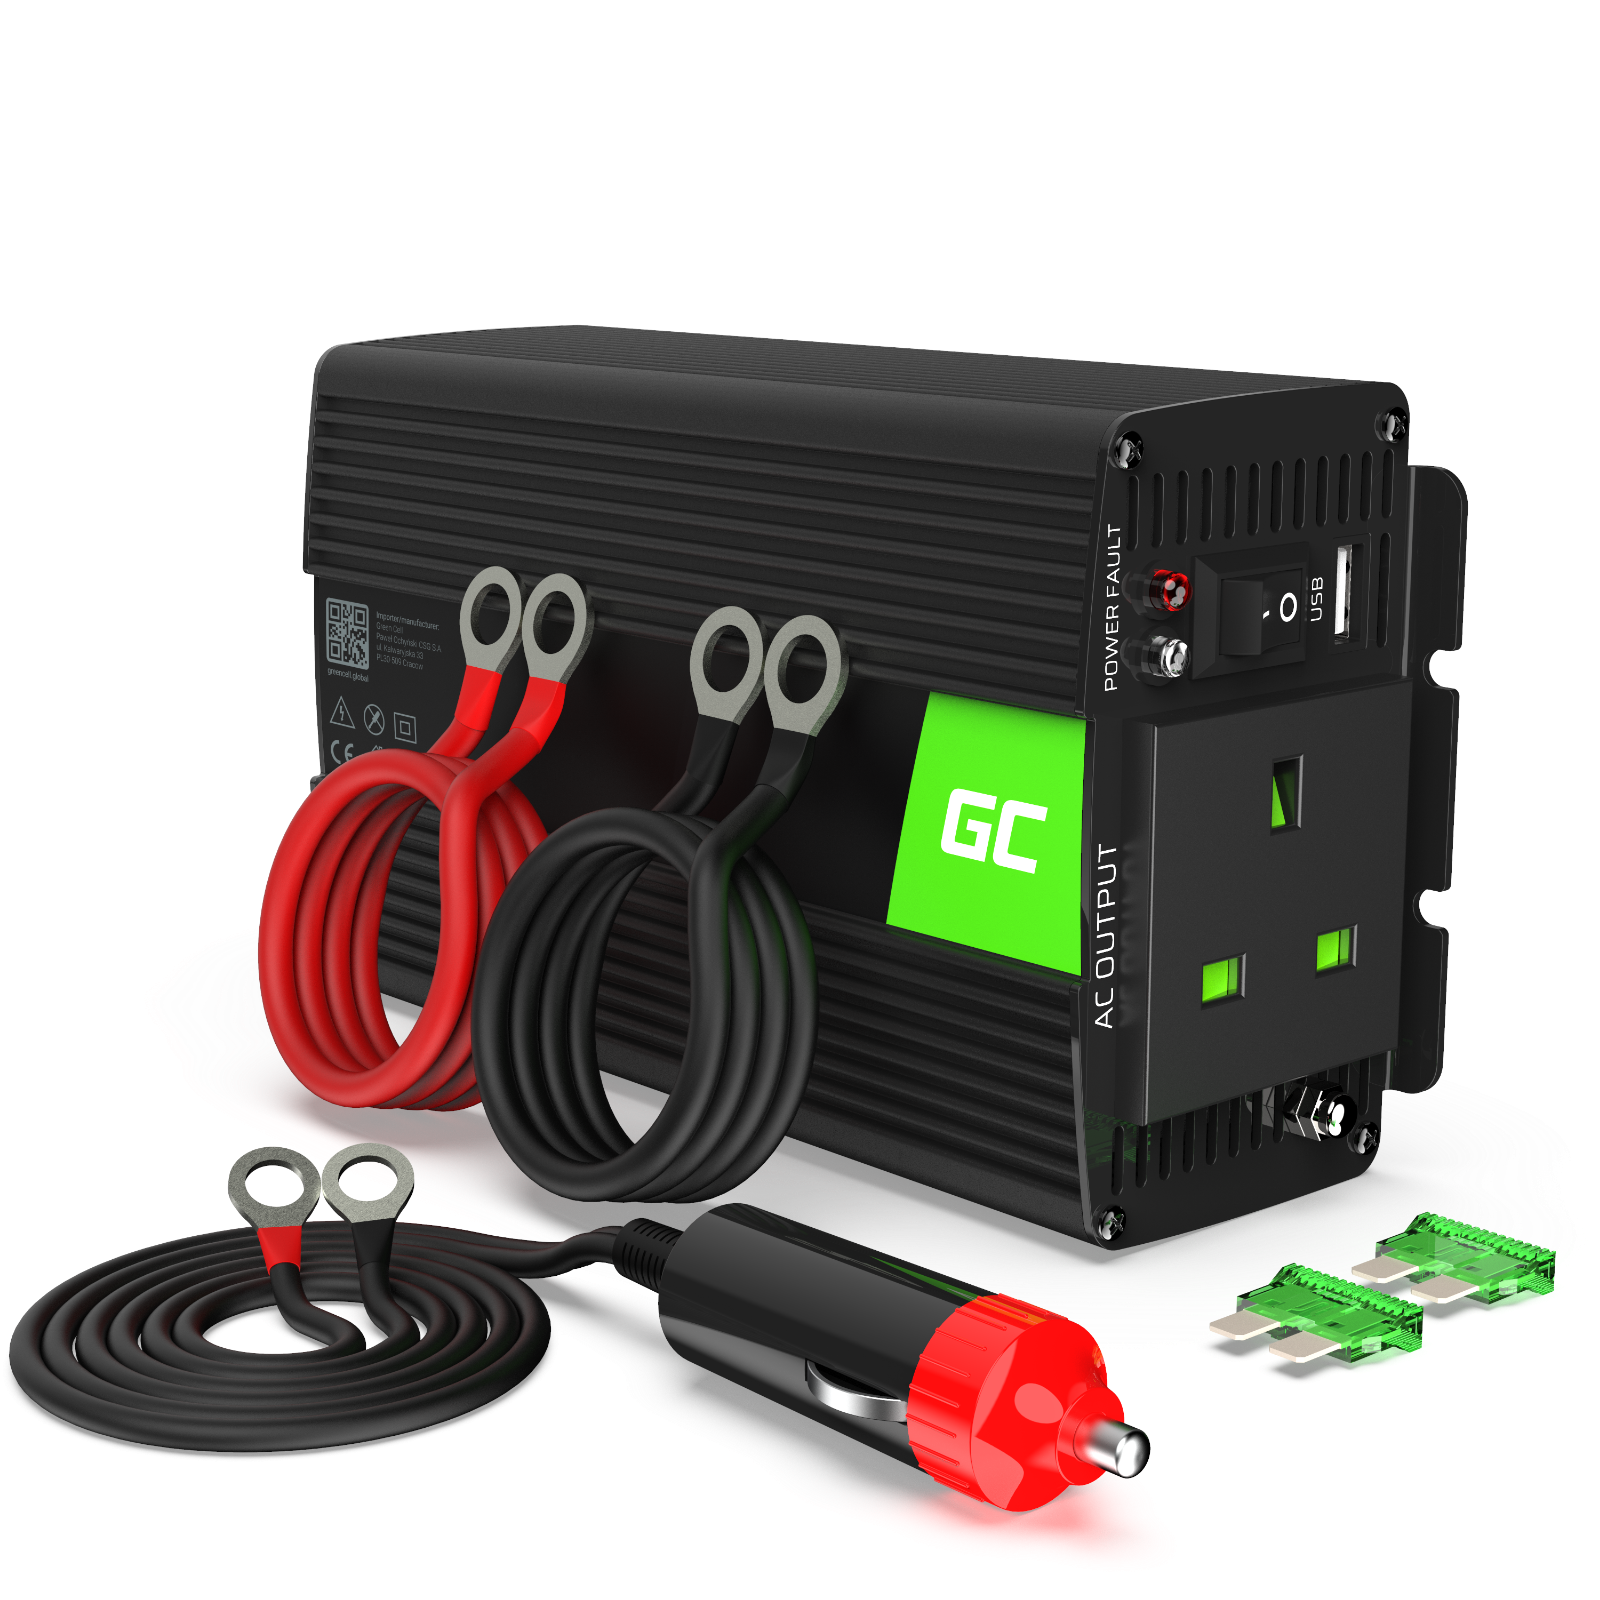
Inverter buying guide
This buying guide features a handful of good quality inverters, hand-picked by us. The Polish company Green Cell features heavily in this list, as we switched to one of their 300W inverters after removing our problematic 3000W inverter and found it to be a durable and efficient inverter, plus even when our first one broke we contacted the company who were very helpful and sent us out a replacement.
There’s a difference between inverters that plug into a cigarette charger and hard-wired inverters; these tend to be at opposite ends of the power scale, and although they are quiet handy we find that cigarette lighter inverters aren’t a solution for long term living as they tend to get quite hot and break with use.
100W +


300W +

1000W +


2000W +


E L E C T R I C A L
Split charge relay system
A split charge relay is a system that allows both the camper van’s starter and leisure batteries to be charge independently or at the same time by drawing power from the vehicle’s alternator.

A voltage sensitive relay is one way to split charge your batteries.
What is a split charge relay?
A split charge relay is a system that allows both the camper van’s starter and leisure batteries to be charge independently or at the same time by drawing power from the vehicle’s alternator.
It is usually controlled by a manual battery isolator switch, however you can also get a voltage sensitive relay which automatically switches dependent on whether there’s power being generated by the alternator.
Split charge relays are very useful for recharging batteries when no other power source is available and there’s few reasons not to have one in your van.
Split charge relay installation
Installing a split charge relay is relatively simple and shouldn’t take much over an hour. If you’re not confident with electrics, make sure you get someone to help who is.
You will need:
Battery isolator switch (we recommend Durite as it’s robust and less likely to catch fire)
Alternatively you can buy an entire split charge relay kit online.
1) Cut a length of butyl cable long enough to run from your van’s starter battery to your leisure batteries and leave yourself a generous amount of extra at either end. We used butyl cable as it is hard-wearing and extremely well-insulated, ideal for under-van applications.
2) Run this cable in whatever way is easiest to you; we ran ours out of the bottom of the engine bay, underneath the cab and then drilled up through the floor behind the kitchen units to feed the wire behind them and under the bed where our leisure batteries live.
3) On the starter battery end, crimp a tube terminal to the cable. Connect the other end of the butyl cable to your chosen battery isolator switch using the manufacturer’s wiring diagram. For a voltage sensitive relay, you will also need to wire in the trigger switch.
4) Lastly, connect the isolator switch to the leisure batteries, and attach the other end to the positive terminal on the starter battery. And there you have it!
As a side note, we don’t have a typical split charge relay system in our van; our Durite battery isolator switch not only allows us to charge either our starter, leisure or both batteries, but it also allows us to start the engine from any combination thereof. This has been endlessly useful when we’ve run short of power in the middle of nowhere, or to ensure that listening to music for hours on end doesn’t drain all of our available power sources.