HOW TO BUILD A CAMPER VAN:
KITCHEN
In this section we’ll cover :
Choosing a layout
Cabinets
Worktops
Sinks and taps
Ovens and hobs
Fridges
Gas safety
Essential kitchen items
Let’s get started.

Contents

Layout

Worktops

Gas safety

Inspiration

Sinks & taps

Fridges


Cabinets

Ovens & hobs

Decoration
Kitchen essentials
Many of the products that appear below are either Amazon or eBay affiliate links. We earn a small commission on sales at no extra cost to you.
When converting a van, one of the most central features in it is going to be the kitchen.
This could be a simple portable kitchen with a camp stove and a bowl, or a fully equipped set-up with all the kitchen equipment you could need. You may be wondering how to install a kitchen in a van, or looking for ideas for a camper van kitchen design and layout.
This guide will explain everything you need to know, from choosing a camper van fridge or oven to how to layout your kitchen and install a sink.

K I T C H E N
Layout
One of the first things you’ll be doing before you even pick up a screwdriver is drawing up a plan for your van conversion’s layout. We have some great advice for this over on our Planning page.
You can do this on paper, digitally, or by using tape to mark out dimensions on your van’s floor and walls- or even better, all three!
In the early stages of designing our kitchen, we used black tape to mark out the worktops and cupboards.
The location of your kitchen will depend on where your doors are, and what kind of view you want to have while cooking. Most UK vans have the sliding door on the passenger side, whereas on European vans it will be on the opposite side, or you may not have a sliding door at all.
You may opt for a straight kitchen down one side of your van, an L-shape for extra worktop space, to have worktops on both sides or to have your cabinets over half of your sliding door area to give you more available kitchen area.
You could also place the kitchen at the rear of your van so you can enjoy a nice view while you cook, although this would block off access via the rear doors, and the same goes for the front behind the cab. You might also want integrate a slide-out van kitchen via the rear or side door so you can enjoy outdoor cooking, or just a simple flip-up worktop that can fold out of the way when not in use.
Your van conversion kitchen dimensions will depend on the size of your van; most standard kitchen cabinets are around 90cm high, which is the ideal height for a person to work at standing up. The length however will vary a lot; you may want just enough room for some basic food preparation, or you may want to maximise your kitchen area if you’re an ardent chef, or if some of your worktop space will be permanently occupied by fixtures such as a hob and sink. You’ll need to factor in enough space for under-counter appliances like a fridge, water storage, plumbing or cupboards and shelves for your food and crockery. If your van is high enough, you can expand the amount of storage with overhead cabinets. Storage is very important in a van; in such a small space every inch counts, so really take some time to plan how you will use your kitchen, but don’t stress over it too much as you can always rearrange things later on.
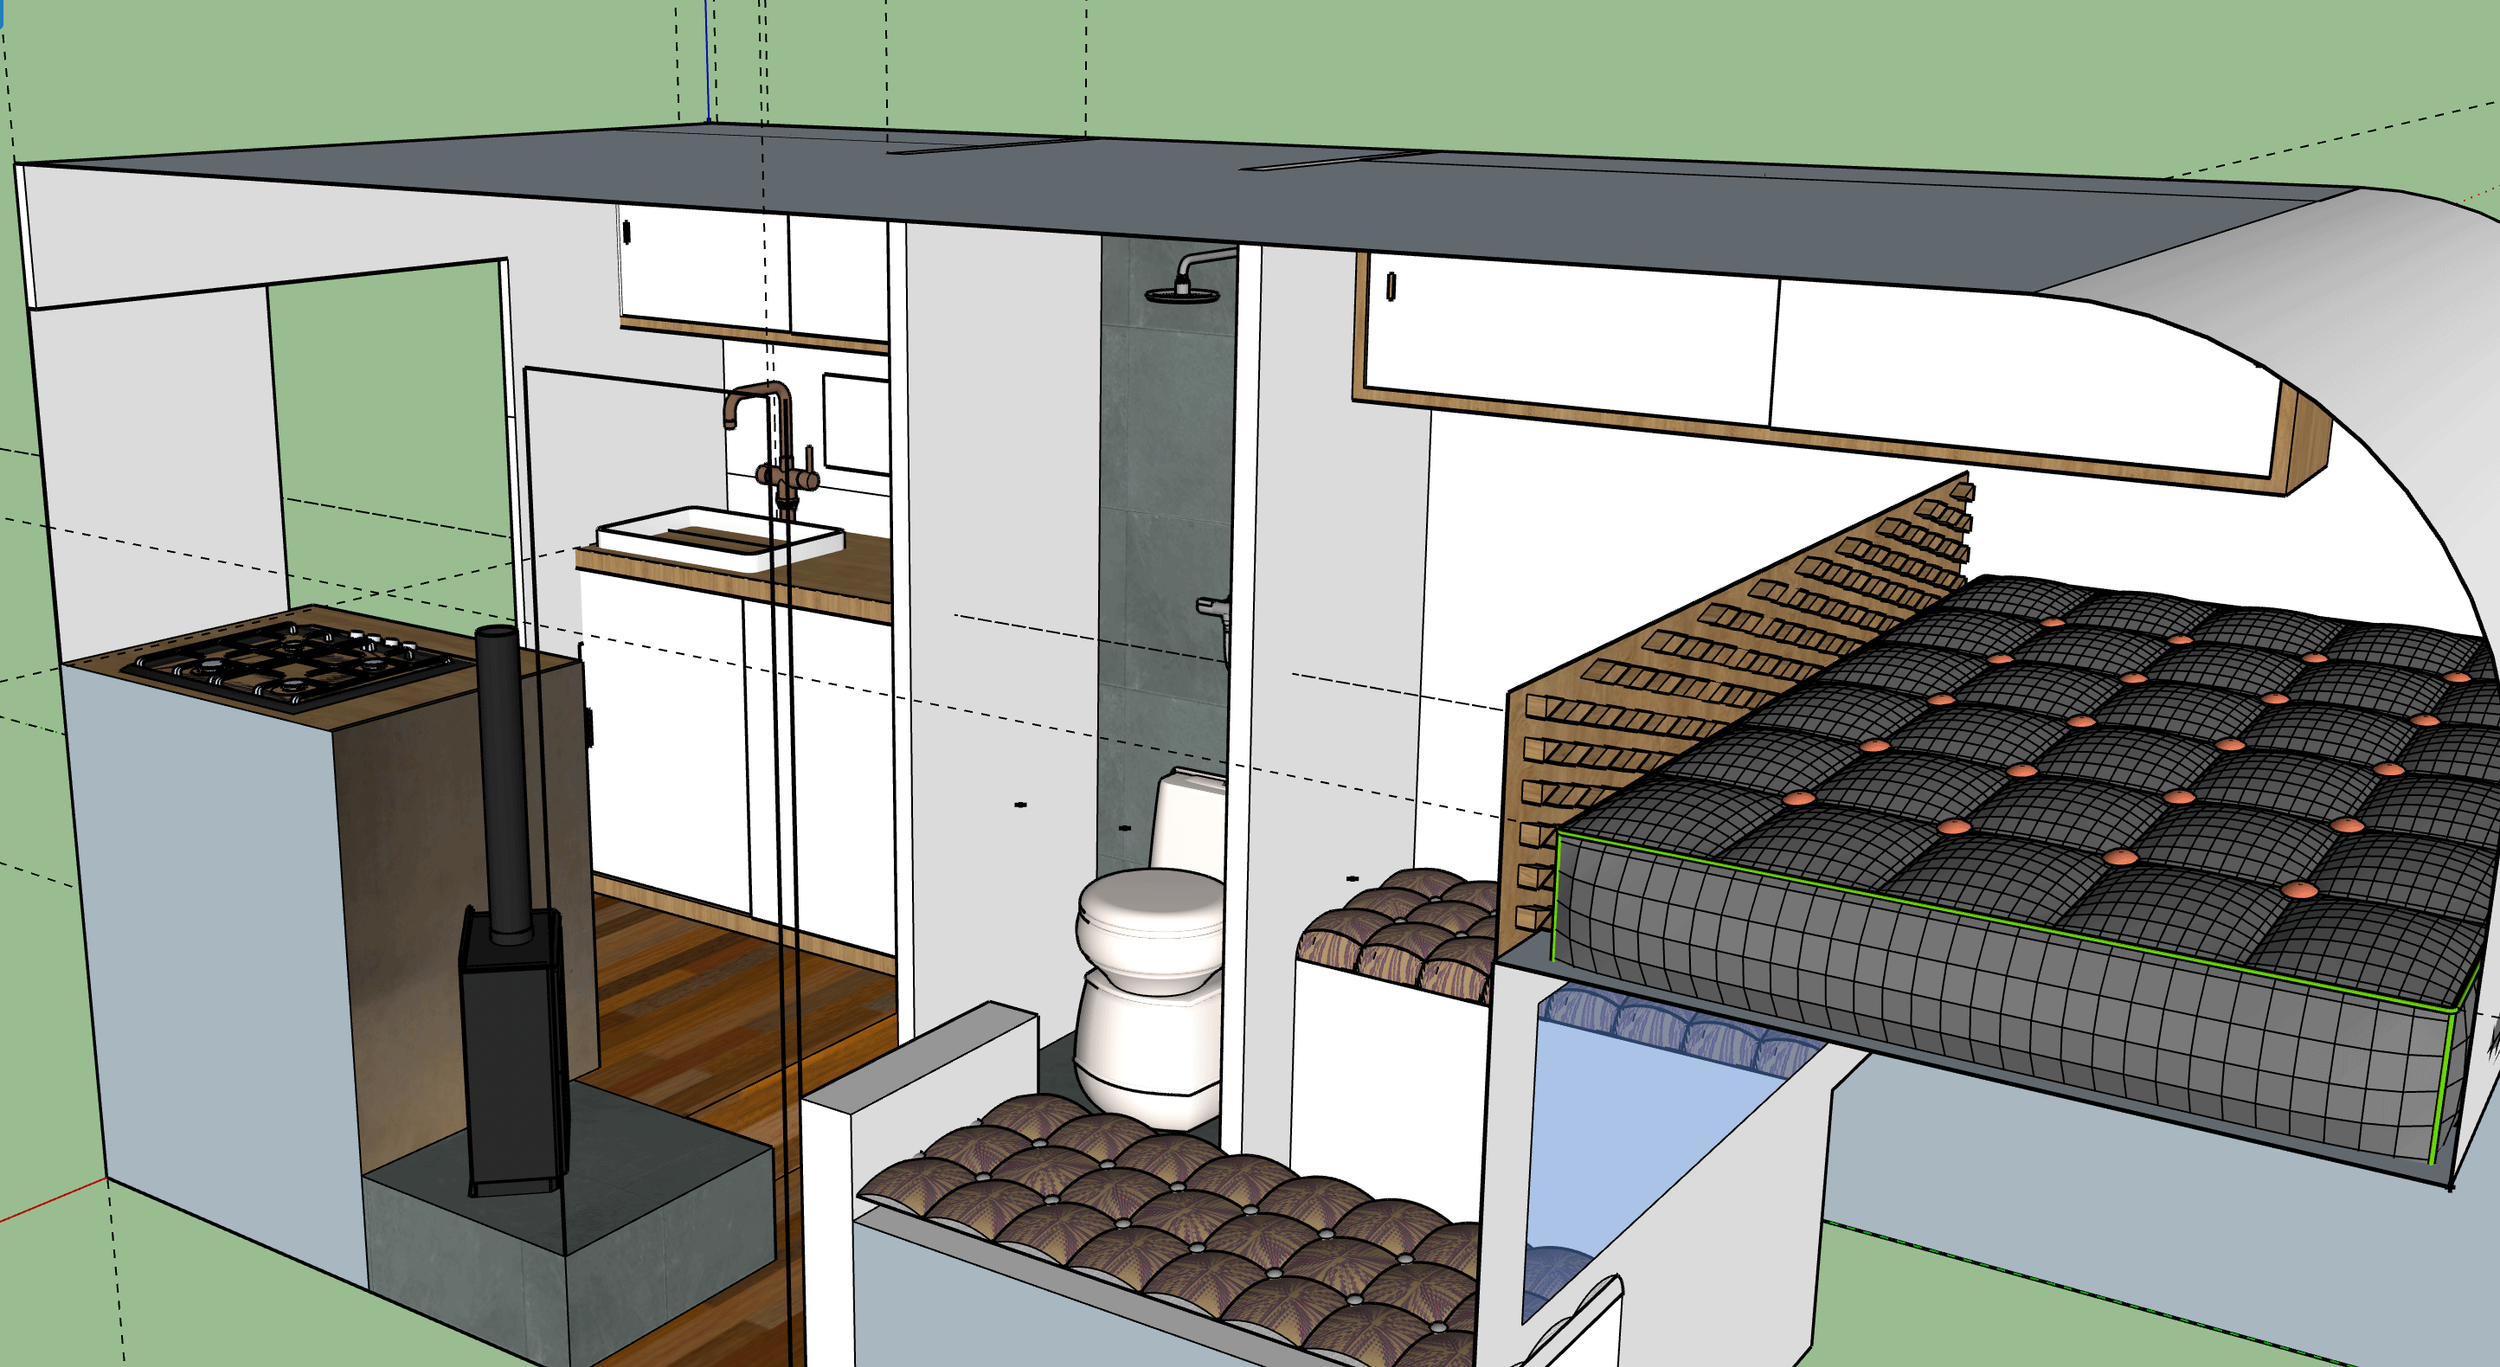
An early SketchUp design of our latest build project. The layout of the kitchen has remained mostly unchanged.

K I T C H E N
Inspiration
If you’re looking for some camper van kitchen ideas and inspiration, we’ve got you covered. Here’s a selection of our favourite van conversions showing different styles and layouts.
None of these doing it for you? Check out one of the many groups on Facebook including Self Build Campers and Real Life, VanLife - Europe and VanLife UK.

K I T C H E N
Cabinets
How you build your kitchen cabinets will depend entirely on the space you are working with and your own creativity. Read on for tips on layout, materials and design elements that will help you to create amazing van cabinets and cupboards.

Our rustic homemade kitchen cupboards in our LDV Convoy van conversion.
Layout
When it comes to creating van kitchen cabinets you have so much flexibility. You could build a kitchen from scratch with batten and plywood, repurpose old cabinets or cupboards, fit a pre-built pod kitchen or even build an IKEA camper van kitchen out of modified furniture.
We’ve found the best way to plan out a kitchen cabinet layout is to work out what fixtures you’ll have under your worktop (fridge, oven, plumbing, water tanks, gas bottle) and build your space around these.
Then, once you’ve worked out how much cabinet space you’ll have for storage, take a few every day items like tins of food and cleaning spray bottles and use their measurements to build your shelf space accordingly.
By having a dedicated cleaning shelf, food shelf, crockery storage etc you’ll maximise your storage space.

The basic kitchen layout in our Bedford CF van conversion.
Movement
Another important thing to consider when designing your cabinets is movement. The items you’ve stacked so neatly in your cupboards will not be stacked so neatly anymore once you’ve been for a drive, so there’s a few ways in which you might want to keep your cupboards secure.
Door locks are a must in a van, whether that’s a turn catch lock, a bolt, or a push catch, you’ll want to attach some hardware to keep your contents locked away and reduce the chances of the inevitable driving spill (it could be water, it could be oil, or worst of all it could be wee, but driving spills are bound to happen at one point or another).
Another great way to keep your contents in check is to add lips to all of your shelves; these only need to be around 1” high, but they’ll really help to reduce things sliding into your cupboard doors and damaging or forcibly opening them.

Door locks are an essential part of building van cabinets.


Materials
There are many different materials you could use to build a camper van kitchen unit, but whatever your choice they’ll need to be two things: sturdy, and lightweight.
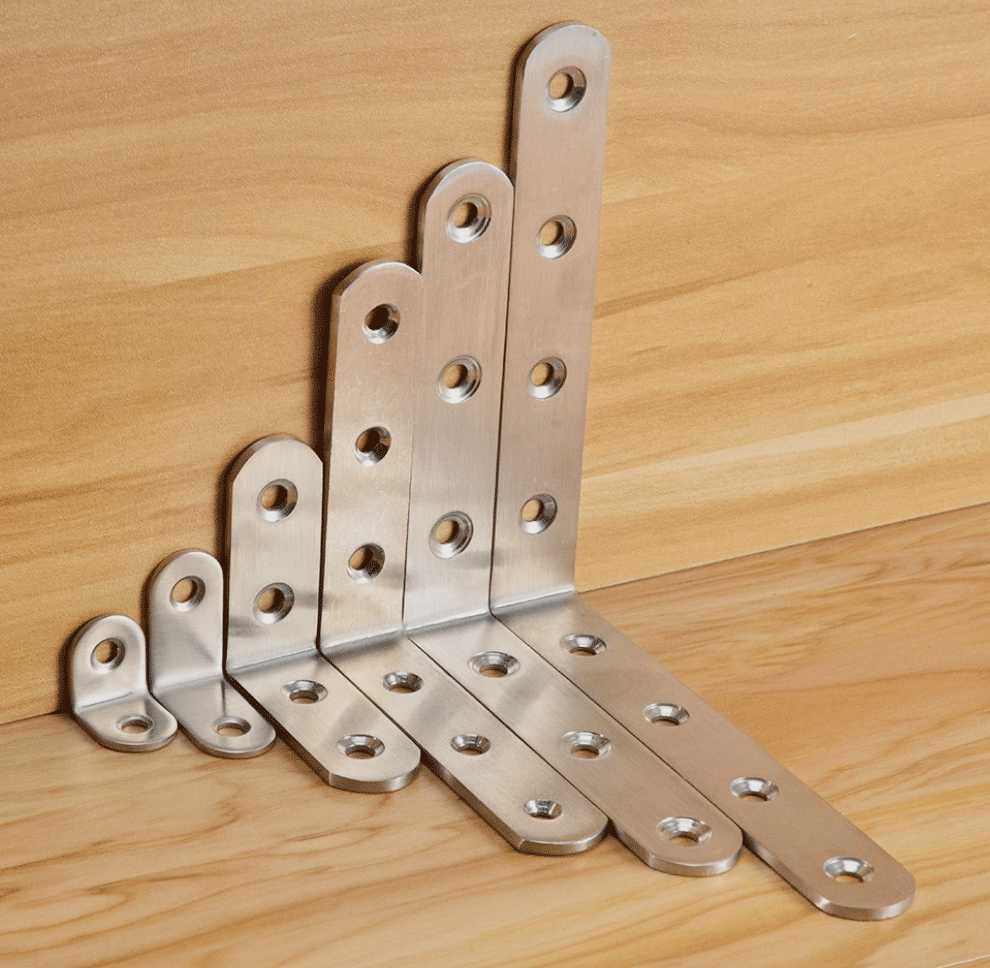
Ideally you’ll want to use the thinnest materials you can while still maintaining strength enough to support fixtures like worktops and a sink, and I know we’ve often gone overkill on the thickness of wood we’ve used, but when stripping apart our old caravan we realised the units were made of nothing more than 1” x 1” timber and 2mm plywood! The important thing is triangulation, using brackets or braces to give the overall structure support.

Lightweight and cheap, using batten is a great way to build the frames for cabinets in your van!
As a rough guide, to build DIY camper van kitchen cabinets you’ll need the following:
1” x 1” batten (25mm x 25mm) or 2” x 1” batten (50mm x 50mm)
3mm plywood for partitions
>9mm plywood for shelves
Pro tip: Rough sawn timber is cheap and can be sanded down to create a smooth finish that can be painted or stained.
You could also create a kitchen out of 2” x 1” aluminium box section and thin sheet metal, GRP or MDF, or a reworked old cabinet or sideboard!
If you’re not that savvy however, and want a quick plug and play van kitchen, then you may want to look into pre-built kitchen units, or pods. These are built from MDF and sent flat-packed to your door ready to be assembled, and are made for a whole range of different vans. You can still customise them too, with your own paint or tiles, so it takes the legwork out of building a unit from scratch (sorry, they’re not available for LDV Convoys yet!).


Design
Then of course the last stage is design! There are so many options here it would be impossible to cover them all. You may want to build a brand new modern kitchen (see these custom sized cupboard doors) or upcycle some old furniture or pallets into something totally unique and eco-friendly (think louvred cupboard doors, toolbox plate storage or driftwood drawer fronts).
You could paint your kitchen using stencils, like we did in our Bedford (see below), or use pieces of driftwood or live edge wood for a nature-inspired finish.
The possibilities are endless!
We’ve included a selection of photos from both of our van kitchens below to give you some inspiration. You can find more ideas over on the Decoration section of our van build guide.


K I T C H E N
Worktops
There are many options for materials you can make a kitchen worktop out of, so the main considerations you’ll want to make are weight and style.
A firm favourite and easy DIY is to order a pre-built solid wood worktop which you can find in most DIY stores like Wickes and B&Q. You can then simply cut this down to length and easily cut out holes for fixtures.

A solid wood worktop is a popular choice amongst van conversion builders.
A live edge worktop is perhaps one of the most coveted styles and is guaranteed to be a showpiece in any van, however they come at a cost, both in weight and pounds. As we didn’t have to worry about weight in our Bedford build, we opted for some slabs of British reclaimed elm which we had made into worktops for a small fee of £400. Yep. They were worth every penny though, but if you want a live edge worktop without breaking the bank check out our guide on how we DIY’d a live edge table for our seating area.
Other considerations are that finding a piece of waney edge timber wide enough to create a worktop out of can be hard, and accounts for most of the cost, so you may need to do some hunting around local timber yards until you find the perfect piece (standard worktops are around 60cm deep). Additionally, the density of wood can differ greatly, which in layman’s terms means that some woods are heavier than others; elm and pine are at the low end of the scale, while oak and walnut are among the heaviest.

The worktop in our LDV Convoy conversion is made using a charred scaffolding board.
In terms of weight, you can’t really get much lighter than bamboo worktops, but laminate worktops or a simple sheet of ply (6mm - 12mm) are also pretty easy on the payload.
Lacking the budget or resources for an actual live edge worktop, we DIY’d one for our LDV Convoy van conversion out of scaffolding boards. These really are brilliant building blocks for just about anything you can imagine, but worktops in particular. We cut them into three lengths which we fitted side by side and cut a ‘waney edge’ into one, then charred the wood to bring out the grain and finished it with a coat of Danish oil. This really brings out the colour of the wood while adding a waterproof protective layer, but you can also use linseed or Osmo oil.

The start of our worktop space in the Bedford CF conversion. Made from reclaimed English Elm.


K I T C H E N
Sinks and taps
So you’ve chosen your layout, decided on an aesthetic, built your kitchen units and installed a worktop; that’s everything but the kitchen sink, right?

The beautiful Moroccan sink and tap in our Bedford CF van conversion.
Sinks
Unless you plan to plan to never wash your dishes, and just simply let the flavours of your previous meals infuse with your current one, or maybe clean them with baby wipes, you will need a sink. Fortunately this needn’t be complex; here’s a few options for camper van kitchen sinks to consider.
*****
Collapsible washing up bowl
A collapsible washing up bowl is probably the bare minimum you’ll need to wash dishes in your van, unless you don’t mind scrubbing cutlery in public toilet sinks (we’ve all been there). These are inexpensive and take up almost no space, and as a bonus can be used outdoors as well as in.

10L Collapsible bowl
Buy here

9L Collapsible bowl
Buy here

Collapsible drainer
Buy here

Collapsible bucket
Buy here
Removable bowl
Much the same as a collapsible washing up bowl, you could also simply place a large bowl or pan on your worktop to wash things in, and then stow this away for later. This saves on the need to install plumbing and drainage as you can simply boil a kettle, although make sure to dispose of your washing up water responsibly, such as down a drain. Try using a large enamel bowl or a vintage jam pan as a quirky van sink.


Plumbed in
Of course the most practical option if you have space is to plumb a sink in. This will need to be set into your worktop and have space beneath for a waste pipe to drain water out, as well as a tap to dispense water; see our Plumbing page for a full guide on installing a camper van water system. Some ideas for sinks are a mini Belfast sink, or an ornate Moroccan enamel sink like we used in our Bedford.


Installation
To install a sink basin, first trace around the bottom of it, leaving enough space that the lip of the sink will sit on the worktop (cut it too big and it’ll fall through). Then use a large drill bit (around 11mm) to drill a hole in one corner which you can insert a jigsaw blade into. Carefully cut the hole out, then fix the sink in place using some sealant to prevent water from dripping through.
Do the same for your sink waste, to keep the water where it needs to be.

Cutting out a hole for the sink in our Bedford CF van conversion.
Taps
There’s not much to say about taps, really- they go hot, they go cold, and some of them mix hot and cold together. What we’re here to talk about is the style of tap you want for your camper van kitchen.
After all, every little element of a van is a chance to make a statement, right?
*****
Mixer tap
Whatever your design, you can’t go wrong with a classic mixer tap, providing you’ve checked the height available above your worktop to make sure that it will fit. This is often more practical than having two separate taps, particularly when it comes to plumbing things in underneath.


Pull-out spray tap
A particularly handy tap to have in a van is a pull-out spray tap, which as well as making washing up easy can also double as a hair-washing, showering or dog-hosing station.
Copper pipe tap
A firm favourite among van-dwellers is the copper pipe tap, an assortment of copper pipe and fittings that lend a quintessentially quirky / industrial look to any van. You can buy these pre-made, or have fun soldering pipes together to create your own.


Moroccan tap
Looking for something a little bit different? So were we, and we stumbled across a gorgeous range of moroccan taps available online, which were a perfect match (naturally) for our Moroccan sink. The only thing to be aware of is that often foreign-made taps (and any other plumbing) come with non-standard fittings, which makes installing them a little more interesting, but nothing a trip to your local Screwfix can’t sort.
For a full guide on installing a kitchen tap head over to our Plumbing guide.


Jerry can with spigot
Sometimes the simplest things are the best. If you don’t want the hassle of installing plumbing then grab one of these jerry cans with a spigot and have instant water storage with a tap. When our plumbing froze and split we ended up using one of these and never looked back! They can be used to wash dishes or wash your hair outdoors and are simple to carry and refill.


For a full guide on installing a kitchen tap head over to our Plumbing page.
K I T C H E N
Ovens and hobs
Now we’re onto what really makes a kitchen a kitchen: the cooking appliances.
What you install will depend on your chosen energy source, available space and what type of meals you cook; we’re here to talk you through each of the options.
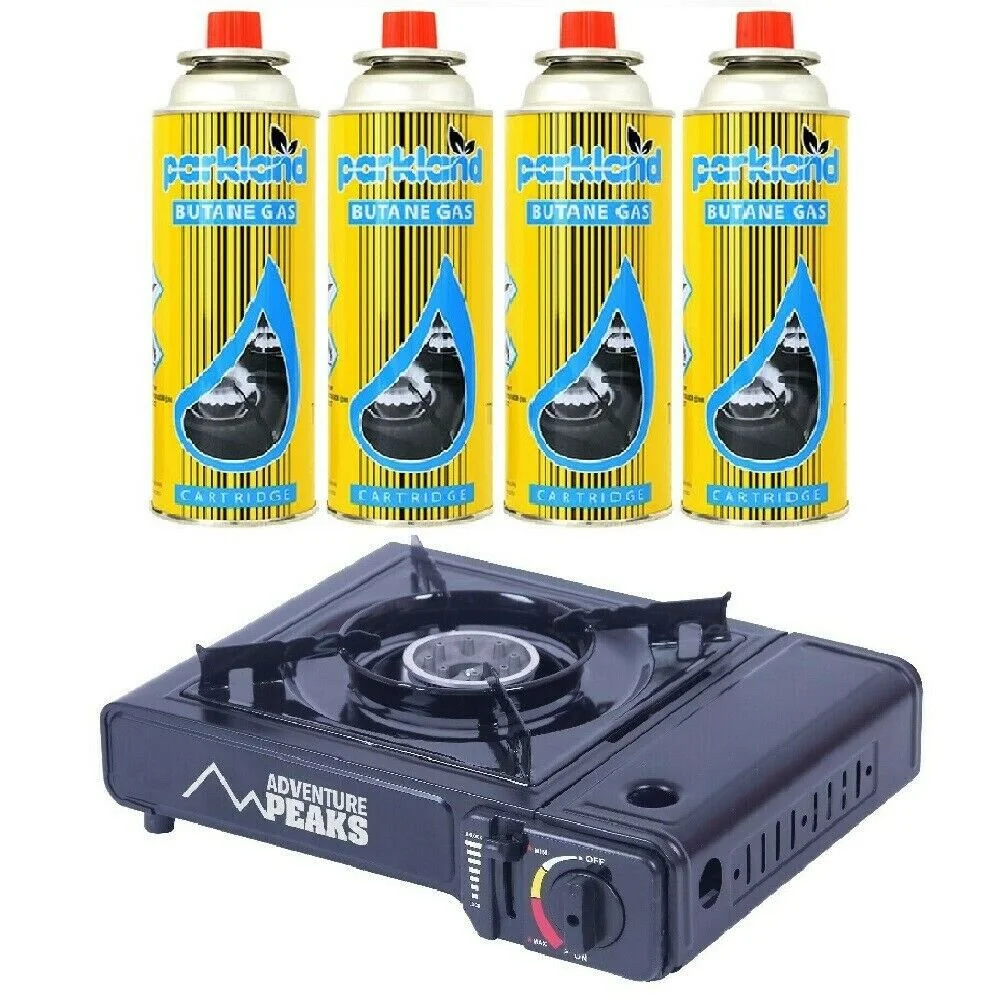
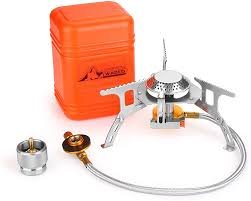
Camp stove
If you want a chuck-it-in-the-van-and-go kind of option, a portable gas stove is ideal. We spent our entire first trip cooking on one of these, and always keep one handy in our van for when we fancy cooking outdoors. They run on gas canisters which are readily available throughout the UK and Europe, although for environmental reasons we’d recommend sizing up to a gas bottle if you plan to be cooking long-term on one of these.
Gas hob
For any kind of long-term cooking arrangement, installing a gas hob is the best option in a van. The best gas hob for a camper van depends on how much worktop space you have available, although it will generally be a 2 ring gas hob like the Dometic 8022 gas stove, or the Thetford topline which comes in a modern black glass finish. These hobs are installed into a worktop, although if you want something you can stow away we use a Campingaz double stove with a bayonet fitting, which means we can disconnect the hob when not in use.


Diesel hob
Diesel hobs are a little bit out-there in terms of cooking amenities, and there are both advantages and disadvantages to installing one. A relatively new concept, diesel hobs are extremely practical as they feed from your van’s fuel tank instead of having their own individual energy source. They’re safer than gas with no risk of carbon monoxide or explosion, they don’t cause condensation and have very low running costs. The downside? Mainly the price point, with most coming in at around the £1500 mark brand new, although this may eventually pay for itself with what you save in gas. Some options to look at are the Webasto diesel cooker and the Wallas XC Duo which is an integrated hob and heater (see this link if no eBay listings are available).

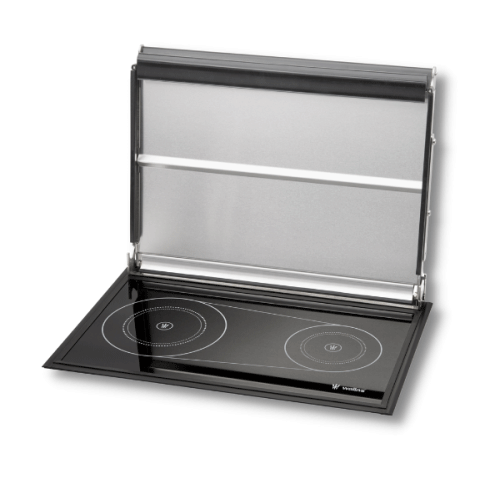
12V induction hob
Induction hobs are inarguably more efficient than gas ones, as they work by heating up the pan itself rather than the ring. The main thing to bear in mind with induction hobs, even those running on 12V specifically designed for camper vans, is that they draw a lot of power. The Leisurewize portable induction hob with one ring consumes between 300W and 2000W, while the two ring Sterling induction uses up to 2800W; the higher the Wattage, the quicker you can boil water, but with a higher power draw. This isn’t a problem if you plan to stay on campsites with EHUs, or have a large capacity off-grid setup, which can even be an advantage as you can run your cooker purely on solar energy, making it a greener choice.
Ideally you’ll need to make a plan of all the devices you plan to use in your van and how much battery, inverter and solar capacity you will need to accommodate this; check out our Electrical guide for more information.


Built in oven and hob
A simple space-saving option is to install an integrated oven and hob in your camper van; a bonus with these, such as the Thetford Triplex cooker, is that they come with up to three rings, and are quite efficient on gas.


Gas oven
Although you may use an oven most days in your house, it may surprise you that an oven really isn’t an essential part of cooking in a van, and you can easily make do without.
However if you are looking at installing an oven, we recommend the Flavel Vanessa; these retro-style ovens are wonderfully simplistic, with only two settings (‘High’ and ‘Off’), although they are not the most efficient on gas. If you’re looking for something a little more modern, try the Thetford Spinflo Duplex, which we have installed in our Bedford conversion. This uses an electric ignition and comes with a built-in grill and more sophisticated temperature options than the Vanessa.


Portable oven
If you don’t want the commitment and possible safety headache of installing a permanent oven in your van, then a portable camping oven might be a good solution. Designed to be used outdoors and running on most popular types of gas cylinder (with appropriate regulator), a combined oven/hob which stows away when not in use could be the perfect solution to open air cooking. Check out the Kampa Roast Master and the Leisurewize PORTA cook plus.


Electric oven
Although you can’t yet (at the time of writing) purchase an oven which runs on 12V, if you want to go the electric oven route you can purchase a low-wattage mini oven such as the Leisurewize 14L or the HOMCOM electric oven, which run on 1200W and 750W respectively. As with using an induction hob, you’ll want to make sure your electrical system is capable of running your appliance before purchase (see our Electrical guide to find out the difference between running and peak ratings on an inverter).


Omnia oven
Not an oven as such, but fiercely popular among van-dwellers for its simplicity and ease of use, the Omnia oven sits atop a stove and its three-part design allows heat to circulate from the bottom to the top, giving you evenly roasted potatoes and perfectly baked, albeit ring-shaped, cakes.

Omnia oven
Solar oven
Although not really a viable cooking option for those of us in rainy England, which is perhaps the reason that solar ovens like the GoSun Fusion are only available for import from the States, we thought we’d include solar ovens as an innovative and unique alternative to regular ovens. The GoSun can in fact be run on a 12V connection from your van if there’s no rays to be found, although perhaps save the roasted veggies for when you hit the Costa del Sol…
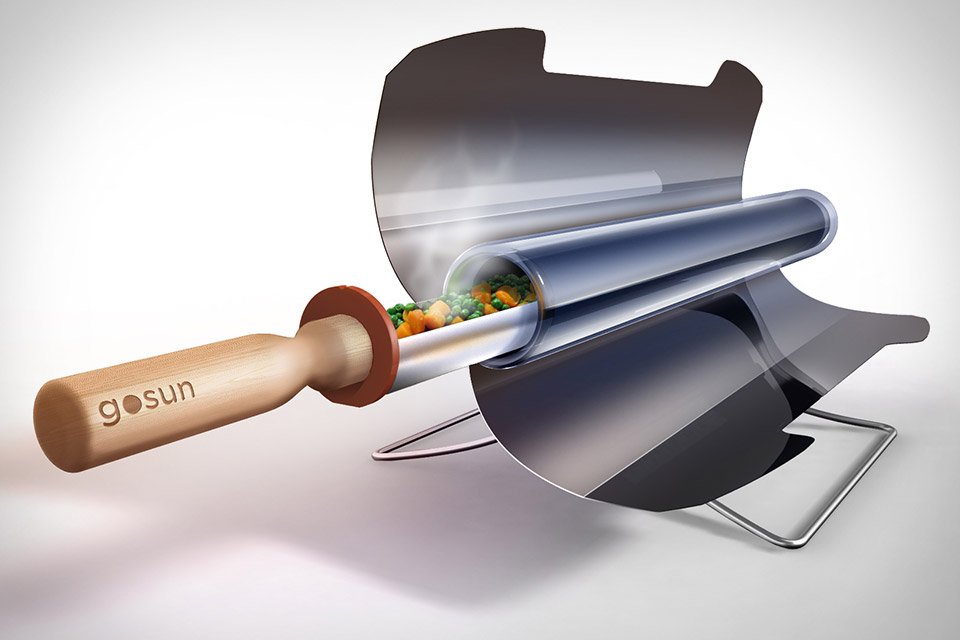
GoSun Fusion
Fitting a camper van hob
If you’re worried about fitting a hob in your camper van then don’t worry, it’s really not that difficult.
Firstly, please read our section on Gas Safety below; it contains important information.
Your gas hob should be fitted no less than 50mm from the back wall and 150mm from any vertical surfaces either side of it to ensure adequate ventilation.
Firstly, trace the outline of your hob onto the worktop surface where you plan to fit it, leaving enough room for the body of the hob to fit through the hole while the lip of it rests on the worktop to prevent it falling through.
Drill a hole in one corner using a 13mm drill bit just big enough to fit a jigsaw blade through, then cut around the line you’ve traced, making sure to wear a dust mask and eye protection (no, really).
Pro tip: put a piece of cardboard between the jigsaw and the worktop to prevent the surface from getting scratched while you cut.
Then fit your hob in place using the sealing strip it came with, or a bead of polyurethane or silicone. If you’ve opted for an electric hob you need only to plug it in, but if you’ve gone for a gas or diesel hob then the installation will need to be completed by a qualified professional.


Cutting a hole for the hob in our Bedford CF camper.
K I T C H E N
Gas safety
Now you’ve bought your gas appliances, it’s time to plumb them in. Read on for essential advice before undertaking any gas work.

Do not attempt to install gas appliances unless you are competent and can safely do the job.
A word on safety: installing gas appliances such as ovens, hobs and boilers should only be undertaken by a qualified professional. If you attempt it yourself you do this at your own risk, and be sure to install a carbon monoxide alarm in your vehicle. Carbon monoxide is a tasteless, odourless gas which can cause nasty side effects such as headaches, nausea and death.
If you’re installing gas appliances with a view to hiring out your camper van, you will need to have these installed professionally and receive a Landlord Gas Safety Record for LAVs (Leisure Accommodation Vehicles). Bear in mind that while all LAV specialists are Gas Safe registered, not all Gas Safe registered engineers are qualified to work on leisure vehicles, so you will need to find a specialist who is able to undertake this type of work and grant you a certificate.
This can be a stringent process, but here are some key takeaways:
Gas bottles must be stored in a ventilated area, either outdoors or in a gas safe cabinet that is accessed externally. They must always be stored upright.
Adequate ventilation must be installed; gas drop-out vents should be installed below gas bottles and LPG appliances, and at least one roof vent should be present
LPG boilers must have an external flue with an overall length of 600mm and must not vent into the vehicle; the flue must be insulated where it enters the roof
LPG boilers should be mounted on cementitious backer board, and not on any flammable materials such as plywood
The correct gas regulator must be installed (propane and butane operate at different pressures)
You can find more information in this article here, but the best person to discuss gas safety regulations with is your gas engineer.
You can also find more information on the best (and worst) hot water heater for a hire van in our Plumbing article.
K I T C H E N
Fridges
Having a refrigerator in your camper van is going to be essential for most people, particularly if you’ll be doing a lot of travelling through hotter climates. A good quality fridge can save you money in the long run on running costs and also in food, but there’s a type of fridge that suits every budget. Let’s go through some of the main ones.

American brand Yeti produce highly rated cool boxes.
Compressor or Two Way fridge

PROS:
+ Most efficient
+ Unaffected by ambient temperature
+ Quiet
CONS:
- Expensive
Compressor fridges are cooled by a compressor which circulates a refrigerant liquid, similar to a standard home refrigerator.
They’re incredibly efficient, relatively affordable, safe, reliable and easy to install, and are also able to run unaffected by the ambient indoor temperature. The only downside is that they tend to be at the higher end of a price tag, and the motors produce some noise, although not enough to disturb your sleep.
We personally love our Explore More compressor fridge, which uses a tiny 0.6Ah or 60W and has kept our food cool in temperatures above 50ºC in our van! It’s budget-friendly, but if you don’t mind splashing out more on a known brand then we had the pleasure of testing out the Dometic CRX50 in our Bedford, which runs at 22Ah or 268W, although the Dometic CFX3 also has Bluetooth and WiFi connectivity, which may well sweeten the deal for you.
All of these have freezer compartments or capabilities, but for a dedicated fridge and freezer you may be looking for a dual zone cooler.
Gas fridge or Three-Way, LPG or Absorption fridge

PROS:
+ Silent
+ Long-lasting
+ Efficient
CONS:
- Safety risk
- Must be professionally installed
- Inefficient to run on electric
As the name implies, these fridges are gas-powered. If you don’t have solar panels, or you don’t want to risk discharging your batteries, then a gas fridge will be your best option.
If you’ve ever owned or driven an old camper van, chances are it will have come fitted with one of these.
Newer gas fridges run efficiently, silently, and typically have a long lifespan, but they require professional installation, can be dangerous due to carbon monoxide, and the cost of gas may increase your long-term expenses overall. They cannot be used if you are parked on an incline and will only cool to a certain amount below the ambient temperature. You can also power these fridges with electricity, however this works out as a pretty inefficient way to keep your food cool due to the large amount of power required in comparison with a compressor fridge.
In terms of products, Smad offer the biggest range of 3-way absorption fridges which are both modern and efficient to run, although Tristar also offer a good range of 3-way coolers.
Cool box

PROS:
+ Starting prices are low
+ Simple to use, no installation required
CONS:
- Doesn’t stay cold
- Affected by ambient temperature
Not to be overlooked here is the humble cool box, running on either 12V or packs of ice and capable of keeping its contents cool for up to 12 hours at a time.
They’re not an ideal solution for long-term campers or travel through hot climates, but they are a cheap and easy solution for weekenders or people that just don’t eat much.
Check out 12V coolers here, or take a look at the Igloo cool box which claims to keep ice frozen for up to 5 days! Also imported from the US is the iconic Yeti Cooler, which was designed to withstand both the Texas heat and backcountry roads.
Some other important considerations to make when choosing a fridge are:
Size:
What area of your van have you dedicated to your fridge? Does it need to fit inside a cupboard, or will it leave behind the front seats?
Capacity:
How much fridge space will you likely need? How often do you go shopping? Generally a single person would need around 20-40L, while a couple might need up to 60L
Door:
Do you want a front or top-opening fridge? This may or may not be so important depending on where you plan to fit your fridge
Power draw:
Do you have enough battery and solar capacity to run your fridge for the entire time you’re not driving? Or most importantly, can you leave it running all day while you’re out without it flattening your batteries?
Technology and features:
Do you want to be able to monitor the temperature of your fridge remotely via a phone app? Do you want low voltage protection that stops the fridge from running when your batteries get too low? How about an interior light, removable wire baskets or a drain plug for easy cleaning?

K I T C H E N
Decoration
To see how we decorated the kitchens in our van conversions, head over to our Decorative page.

K I T C H E N
Kitchen essentials
The only thing left to do now is to fill your camper van kitchen with the essentials! You really don’t need loads of fancy equipment to cook delicious and filling meals in a camper van, but it makes sense to buy quality items that will last you a long time and see you through many road trips.
Here’s our list of camper van kitchen equipment and essentials to get you started:


So there we have it, everything you need to know about building a camper van kitchen.
What’s next on the checklist? Browse our van build guide below: